Wednesday, September 22, 2010

Quick Refrigerator Dills


The last few years I've done a wee bit of preserving each fall. I've tried something new every year. Despite the effort spent chopping, peeling or straining, and the time spent over the stove stirring and boiling jars, I inexplicably worked in small batches, yielding just a few jars of whatever it was I made. I wasn't overly confident at the start. The process seemed daunting. I certainly wasn't prepared to purchase a large canner for boiling jars which would take up a whole cupboard and sit unused the rest of the year. And I really didn't want to end up with 20 jars of something that didn't work out.

But, to my surprise, it wasn't that hard. It did take a fair bit of patience, but it was rewarding. Over the years I've tried: apple butter (after I discovered there is no butter in apple butter), concord blue grape jelly (when I discovered that these grapes are terrible for eating), and crab apple jelly (when a friend discovered that the pesky tree dumping little bits of fruit into her back yard actually produced something wonderful).

Last year I found a fantastic book at the library called "The Complete Book of Pickling: 250 Recipes from Pickles and Relishes to Chutneys and Salsas" by Jennifer MacKenzie. I suddenly felt really ambitious and tackled curried pickled cauliflower, dill pickles, corn and tomato salsa and peach chutney. And I moved on to slightly bigger batches, so I still have a jar of each of the last two.


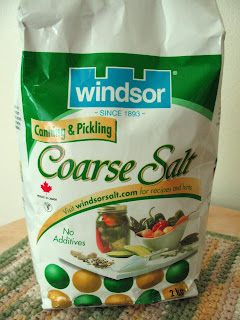
I also still have an enormous bag of pickling salt...


If you're trying pickling for the first time, I suggest you buy only as much as you need at a bulk store. Pickling salt (left) is much coarser than table salt.


Last year's dill pickles were surprisingly good. I used one of the recipes for Classic Quick Dill Pickles* (slightly adapted) from the book and decided to make them again this year. *The book credits Pat Burley with the original recipe.

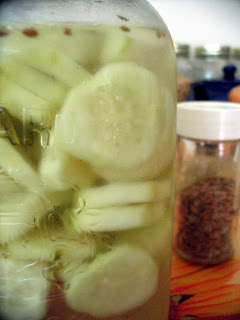
I bought a nice batch of baby dill cucumbers. And then a very long time passed. When I finally had time to make my pickles, I found some very sad looking cucumbers. Here's the worst one:


What to do? I really really hate throwing food away (unless it's harmful). But these cukes weren't dangerous, just ugly. So, I peeled off the wrinkly skins and they were still nice and crisp. I sliced them up and invented what I'm calling...

Quick Refrigerator Dill Pickles
Makes 2 - 1 litre mason jars

3 litre basket of baby dill cucumbers
3 1/2 cups of water
1 1/3 cups of white vinegar
1 1/2 tablespoons of pickling salt
1 tablespoon of granulated sugar
2 cloves of garlic, cut in half
2 tablespoons of dill seed

Equipment: 2 - 1 litre mason jars with lids (disks and bands)

Note: Because these jars go directly into the fridge, there is no need to process them in a water bath canner. However, if you want to make true preserves, it's essential that you follow your recipe's instructions and recommended times for processing the jars to ensure food safety. For this recipe, it is still essential to sterilize the jars and to use new disks and bands (or at least fairly new ones free of dents and rust) and it's helpful to read through the recipe before starting.

Start by boiling a large kettle of water for sterilizing.

If skins are wrinkly, peel cucumbers. Otherwise just scrub them and slice them into coins. In a medium pot combine sugar, salt, water and vinegar. Bring to a boil over medium heat and stir until sugar and salt are dissolved.

While mixture is heating, sterilize jars. To sterilize, place jars in a sanitized sink and pour boiling water over all parts, including lids.

Place one clove of garlic and one tablespoon of dill seeds in each jar.


Divide cucumber slices between the two jars. Pour in hot pickling liquid leaving about 1/2 inch (1 cm) of room at the top for air. Wipe the rim and place hot lid disc on jar. Screw on band and let jars cool. Even though you're not processing the jars, the jars will probably still seal - you will hear them pop. Whether or not this happens, once the jars cool, put them in the fridge.


Now here's the not so quick part. You'll still want to leave them for about a week before you try them. But it will be worth the wait. In the fridge, they should keep for about 2 months after opening.
Thursday, September 16, 2010

Kale and Red Pepper Skillet Rice

This is not risotto...


I'm going to take some flak for this, but here goes... What's the deal with risotto anyway? And why do TV chefs make such a fuss over it? I understand it takes some patience and timing for a good batch, but I'm still not a fan. I'm happy to be proven wrong, but to me it's just mushy rice.

I prefer a rice dish that's drier and less starchy and with more texture. Brown rice fits the bill. Simmered with some veggies, some broth and a tiny bit of salty meat, it works as a complete meal - something with a lot of flavour that you can sink your teeth into.

I'm not into traditional bacon, but I'm sure it would be delicious in this recipe. I chose to use a bit of chicken bacon for added flavour and protein.


Kale and Red Pepper Skillet Rice
Serves 2

1 cup brown rice
2 slices of chicken bacon
1 red pepper
2 cups of chopped kale
1 medium onion
1 large clove garlic
2 cups of vegetable broth
1 cup of water
2 tablespoons of olive oil, more as needed

Note: You'll also need a large deep frying pan with a lid.

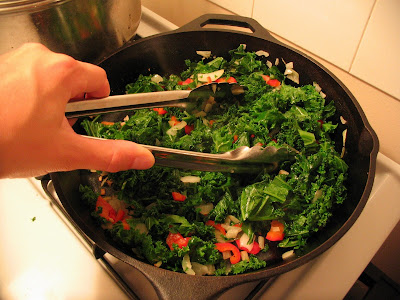
In a large frying pan, brown bacon and set aside. Heat 2 tablespoons of olive oil and sauteĆ© onion and red pepper until soft. Add chopped kale and garlic and sauteĆ© until kale is wilted.


Push the vegetables to the side of the pan and add the uncooked rice. Cook for 3-5 minutes stirring often. Add the broth and water. Chop the bacon and sprinkle it on top. Give it all a stir and bring liquid to a boil. Then reduce heat and simmer on low, covered, until rice is completely cooked. Season with salt and pepper.


Thanks to Steph at mmmm good for providing me with proof that I wasn't imagining Chef Ramsey and that line about the risotto....

Wednesday, September 15, 2010

Marinated Tofu Stirfry


In general, I like working with a minimum of tools and equipment in the kitchen. A good knife, a cutting board and a cast iron frying pan go a long way.

My mom has had the same two cast iron frying pans for as long as I can remember. After experimenting (read: burning) with stainless steel and trying out (read: scratching) non-stick versions, I realised that I should admit that my mom might be on to something. I went out and got the best, most versatile pan I’ve ever had. And it will last forever.

In the old days, you had to worry about “seasoning” your cast iron – this involved coating it with oil and heating it at high temperatures to protect it from rust and to create a non-stick coating. But many brands today offer a pre-seasoned version, which means your pan will need very little maintenance from the day you bring it home until the day you pass it on to your great grandchildren.

A cast iron pan with a lid works well for a small stirfry. (I’ve got nothing against the tried and true wok, but why store two pans if you can make do with one?) Toss the marinade in with the veggies and it will infuse them with flavour as they steam.


Marinated Tofu Stirfry
Serves 2

1 cup of brown rice
1/2 cup each of broccoli, carrots, onion, and asparagus, washed and chopped
1/2 block of extra firm tofu, cubed

Marinade:
1 tablespoon honey
1 teaspoon Thai red curry paste
2 tablespoons rice vinegar
1/3 cup soy sauce
1/2 teaspoon fresh or dried ginger
1 garlic clove, minced
1/2 cup water
1 tablespoon sesame oil

In a medium bowl, combine all marinade ingredients except sesame oil. Add tofu and marinate for 6-8 hours.


Cook rice according to your preferred method.

In a cast iron or other large fry pan, heat 1/2 tablespoon of sesame oil. Add tofu in one layer to the bottom of the pan (reserve the marinade). On low, brown tofu on all sides.

Add marinade to the tofu, then layer the veggies on top. Bring marinade to a boil then reduce heat to medium, cover, and simmer until veggies are tender crisp. When veggies are nearly done, uncover the pan, toss veggies and tofu in the marinade, turn up the heat and reduce the liquid slightly.

Pour over brown rice and drizzle with the remaining sesame oil.

Just a note: The jury is still out on tofu. Studies are mixed on its potentially beneficial or damaging estrogenic effects. My personal decision is to enjoy it occasionally, in moderation, choosing MSG free, non-GMO tofu. Please do what works for you.

Monday, September 13, 2010

Blueberry and Flax Pancakes

Every year when we head off to go camping, I make a list of all the fun food that we can whip up over our single burner Coleman stove. To classify anything I make as a "recipe" is stretching it. It's really a chance to take a vacation from cooking and indulge in some quick ready-to-eat foods that I try to stay away from the rest of the year. Somehow though, these meals prepared outside in the fresh air taste so amazing. Waking up to some strong coffee and a big plate of pancakes after a night under the stars tops it all.

I'm sure I'm not the only one who is thankful for a good "just add water" buttermilk pancake mix while camping. But when I'm back at home with my box of leftover pancake mix, I feel the need to put in a bit of effort, or it feels like cheating.

Enter a box of fresh Ontario blueberries and a healthy dose of ground flax seed for a more nutritious version of the campfire pancake. (Try adding ground walnuts or almonds to the mix for added protein and flavour.)


Yes, I used a mix, but no one is complaining...